☰
Crochet Es Mi Pasión
X
Home
Crochet Blanket
Crochet Patterns
Baby Patterns
Crochet Clothes
Crochet Stitches
Quilting Patterns
Institutional
About Us
Privacy Policy
Contact
Search
Ops! Page not found
But no problem, you can try to find it like this:
Carrying out the search;
Clicking on the logo to go to our main page;
By clicking on the articles below.
Search
Interesting Articles
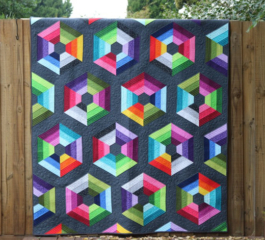
Calippo Quilt Free Pattern
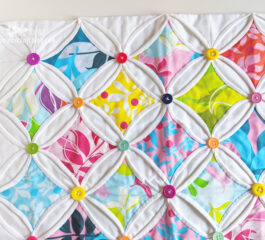
Cathedral Window Quilt Pattern
Double Aster Block Quilt
Stella Block Pattern in Quilting
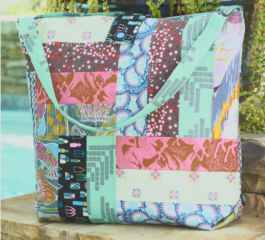
Patchwork Carryall Pattern
We use
cookies
to offer you the best experience on our website. By continuing to browse, you confirm that you accept these terms.
Accept