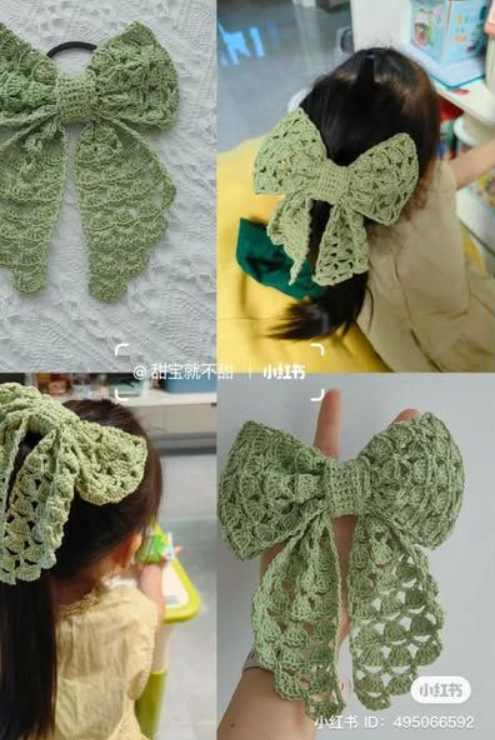
Step 3: Skip 5 chains, then in the next chain, work 4 dc again. Repeat this until you have 5 motifs total.
Step 4: Chain 5, turn your work.
Step 5: Into the spaces between the motifs, work single crochets (sc) to anchor the next row. Chain 5 between each single crochet.
Step 6: Turn, and work another row of motifs:
Yarn over, insert your hook into the center space between the chains, and work 4 dc.
Repeat for all chain spaces, creating 5 motifs again.
Repeat these two rows (chains and motifs) until you have 15 rows in total. This forms the full bow shape.
Creating the Outer Frame
After completing 15 rows:
Chain 5.
Use slip stitch to attach to the last double crochet of the previous motif row.
Continue this process downward along the edge, creating a border of chains and connecting with slip stitches.
Repeat on the other side to create a symmetrical border frame.
Folding & Assembling the Bow
Fold the long strip so that the motifs are stacked evenly on top of one another. Align the edges and make sure stitches are facing the same direction.
Using single crochet, join the center together by working through both layers, aligning the motifs as you go.
Cut the yarn and secure tightly. This will be the center of your bow.
Tail Section of the Bow
Step 1: Chain 20.
This will be the base for the tail with 4 motifs.
Step 2: Repeat the motif pattern for 6 rows.
Step 3: To shape the pointed tip of the tail:
After the 6th row, decrease the number of motifs per row.
Work 3 motifs, then 2 motifs, then 1 motif – each on a new row.
Chain 5 between each motif as before.
Step 4: Add a border as done for the main bow using chains and slip stitches.
Repeat this entire process again to create the second tail, ensuring that the direction of the motifs mirrors the first tail so that both hang downward from the bow.
Middle Wrap Band
To create the center wrap:
Chain 5.
Work 4 single crochets across the chain.
Continue turning and working 4 sc for 12 rows total.
Wrap this small strip tightly around the center of the bow (where you joined it earlier).
Sew the ends securely or use hot glue if preferred.
Finishing Touches
Attach the bow to a clip or barrette using hot glue if you plan to use it as a hair accessory.
You can also sew it onto clothing, hats, bags, or gift packages.
For a larger bow, increase your starting chain (in multiples of 5).
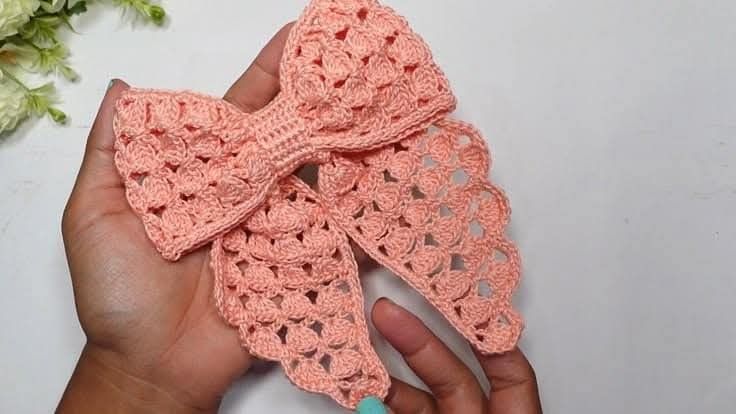
Easy Crochet Ribbon Bow
The Easy Crochet Ribbon Bow is a delightful and beginner-friendly project that adds a touch of elegance and charm to many handmade items. Whether you’re decorating hats, headbands, baby blankets, gift packages, or home décor pieces, this sweet crochet bow is quick to make and endlessly versatile. With just a small amount of yarn and a few basic stitches, you can create beautiful bows in minutes.
This pattern is perfect for crocheters of all skill levels, especially beginners who want a fast and satisfying project. It’s also a wonderful stash-busting idea, allowing you to use leftover yarn in creative ways. The Easy Crochet Ribbon Bow is not only practical but also a lovely detail that can elevate the look of many crochet creations.