Always use the same yarn that was used for crocheting to avoid issues during washing. If the yarn is too thick, it can be split into thinner strands.
Care Instructions
Follow the care instructions provided on the yarn label. Crochet items are best hand washed and laid flat to dry.
Materials
Instructions (US Terms)
Row 1
Ch 26. Insert hook into the 2nd ch from hook and work 25 sc across.
Row 2
Ch 1, work 25 sc as follows:
Insert hook into the first stitch (2 loops on hook), then insert hook into the second stitch from back to front (4 loops on hook), and complete a single crochet.
Continue working sc in this manner across the row.
At the end of the row, work one sc through the last two loops.
Row 3
Ch 1 and work exactly as in Row 2.
This creates a ribbed texture. Continue working rows until the piece measures 60 cm (approx. 24 in) in length.
Width should be 18–20 cm (7–8 in).
Length = head circumference + approx. 5 cm (2 in).
The number of ribs must be even.
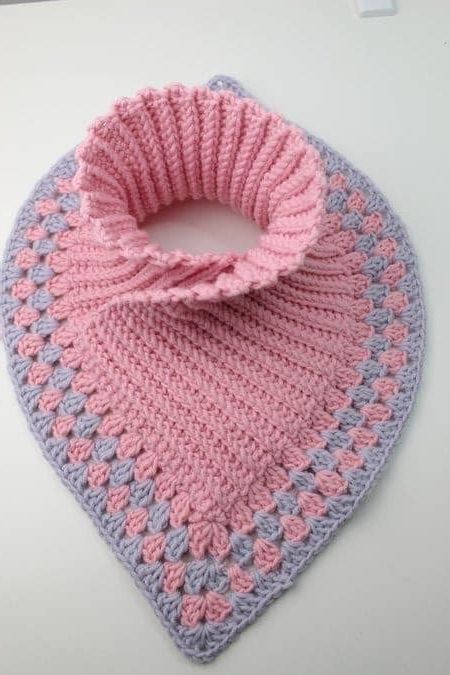
Folding the Crocheted Rectangle
Fold the rectangle so that the side with the last stitch is positioned on the left. Fold this corner downward and place the opposite side on top, forming a point at the bottom.
(Back view ↓)
Joining the Piece
Insert the hook through both points (working through both layers), ch 3, then work 2 dc into the same stitch.
At each rib (insert hook to the left of the rib), work 3 dc into the same stitch. Continue joining both sides together in this manner.
Work until reaching the center back, distributing the ribs evenly. Between the center dc groups, ch 3.
Continue following the pattern. At the point, again join both layers together.
At the end of the round, insert hook into the point, work 3 dc, ch 2, and close the round with a sl st, changing color at the same time.
Slip stitch: pull the working loop through the loop on the hook.
Round 2
Begin with ch 3. After the third dc, insert the hook and work 3 dc.
Always work 3 dc between each group of 3 dc.
At the back point, work into the ch-2 space:
3 dc, ch 2, 3 dc.
Continue following the pattern.
At the front point, work into the ch space:
3 dc, ch 2, 2 dc.
Close the round with a sl st into the 3rd chain.
Additional Rounds
Begin each round with ch 3 and repeat the same process.
Work as many rounds as desired.
In this model, 3 rounds were completed.
Finishing
Weave in all yarn ends securely.