Crafting an Owl Pincushion Pattern

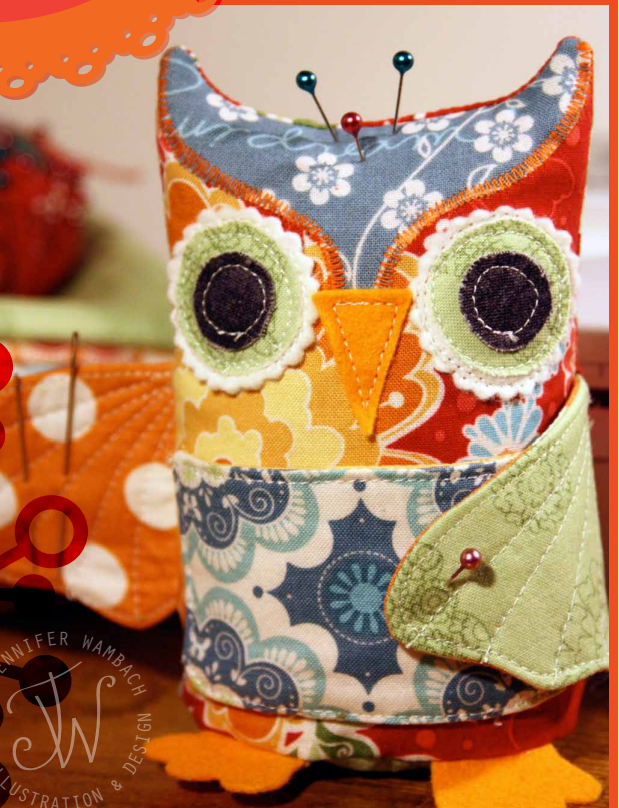
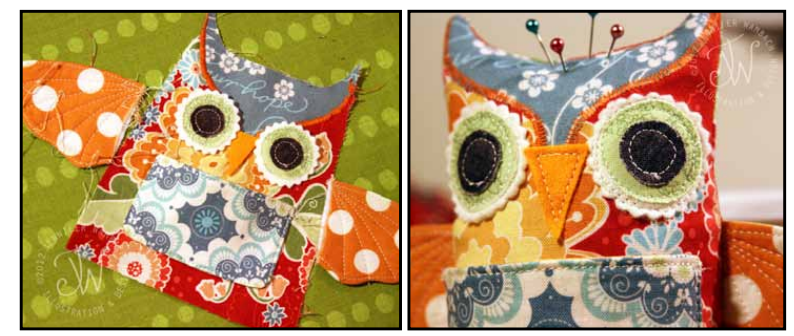
In the enchanting world of quilting, every stitch tells a story, and every creation carries a piece of its maker’s heart. Today, we embark on a delightful journey into the realm of owl-themed quilting with the charming Owl Pincushion Pattern. These wise and whimsical creatures not only add a touch of personality to your sewing space but also serve as practical tools for your quilting adventures.

The Appeal of Owl Pincushions: Owl-themed crafts have long held a special place in the hearts of artisans and crafters. Symbolizing wisdom, intuition, and mystery, these nocturnal creatures inspire a sense of magic and wonder. Incorporating owl motifs into quilting projects infuses them with a touch of whimsy and adds a playful element to the creative process.

Pincushions, essential companions for every quilter, are both functional and decorative. They keep your pins and needles organized and within reach while also serving as charming accents for your sewing area. An owl pincushion combines practicality with personality, making it a delightful addition to any quilter’s collection.

 Owl Pincushion Pattern

Owl Pincushion Pattern

Here are the fabrics I used for the different pattern pieces:

A. Forehead: Flutter Dream Blue
B. Body front & back: Flutter Main Red
C. Base: Flutter Butterfly Green
D. Wings: Flutter Butterfly Green (outside)
& Flutter Dot Orange (inside)
E. Pocket & Lining: Flutter Doily Blue (outside)
& Flutter Butterfly Yellow (lining)
F. Eye – bottom: Wool blend off-white felt
G. Eye – middle: Flutter Butterfly Green
H. Eye – Pupil: Riley Blake Basic Shades – Asphalt
Beak & Feet: Wool blend orange felt

Step 1: Select Your Fabrics Choose fabrics that complement each other and evoke the charming essence of an owl. Earthy tones such as browns, tans, and grays work well for the body, while brighter colors can be used for the wings and eyes to add a pop of personality.

Step 2: Cut Out Your Pieces Using the provided pattern or your own design, cut out the pieces for your owl pincushion from the selected fabrics and fusible interfacing. You’ll need two body pieces, two wing pieces, and two eye pieces.

Step 3: Assemble the Owl With right sides together, sew around the edges of the body pieces, leaving a small opening for turning. Repeat the same process for the wing pieces, leaving one side open. Turn both pieces right side out and press them flat.

Step 4: Add Details Using embroidery floss or fabric markers, add details to the owl’s face, such as eyes, a beak, and feathers. Let your creativity soar as you bring your owl to life with intricate stitches and playful accents.

Step 5: Stuff and Seal Fill the body of the owl with polyester stuffing until it reaches your desired firmness. Then, slip stitch the opening closed to secure the stuffing inside. Attach the wings to the sides of the body using a whip stitch or your preferred method.

Step 6: Finishing Touches Stand back and admire your handiwork! Your charming owl pincushion is now ready to keep your pins and needles safe and sound while adding a touch of whimsy to your sewing space.

 Owl Pincushion Pattern

Owl Pincushion Pattern

FREE PATTERN:

Exciting news, fellow quilters! The pattern for the adorable Owl Pincushion is available below, completely free of charge. Simply scroll down to get your hands on this whimsical pattern and start crafting your own charming owl companion today. Happy quilting!

Crafting an owl pincushion is not only adelightful way to showcase your quilting skills but also an opportunity to infuse your sewing area with a sense of whimsy and wonder. Whether you’re making one for yourself or as a gift for a fellow quilter, this project is sure to bring joy and inspiration with every stitch. So, gather your materials, unleash your creativity, and let your imagination take flight as you embark on this delightful quilting adventure. Happy stitching!

You Are Here:

We use cookies to offer you the best experience on our website. By continuing to browse, you confirm that you accept these terms.