Ch46
Row 1 Hdc in 3rd ch from hook and in next 7, Inc3 in next st, Hdc in next 5, Inc3 in next st, Hdc in
next 14, Inc3 in next st, Hdc in next 5, Inc3 in next st, Hdc in next 8
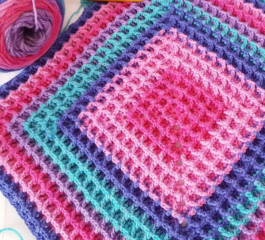
Place a marker in the centre stitch of each INC stitch and move marker each row.
Rows 2 – 10 Ch1 TURN HDC in each stitch placing an Increase3 in the centre Inc from the previous
row and moving the markers up as you come to them.
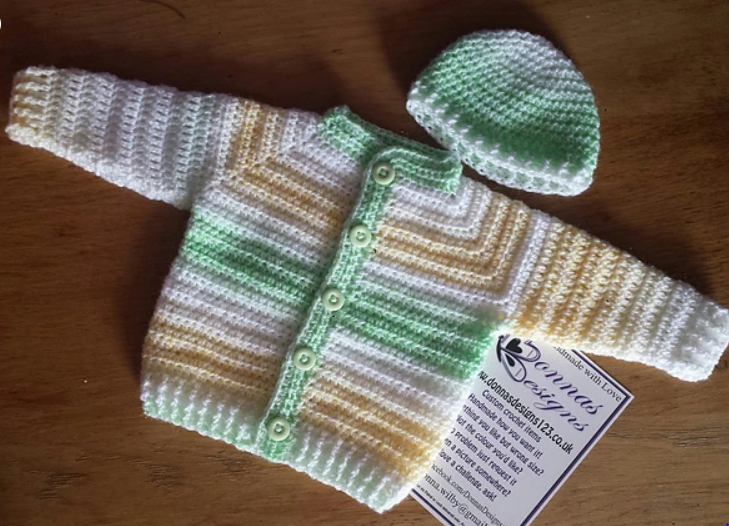
It should measure 8.25 inches across the front at this point with 124 stitches
Row 11 Ch1 turn Hdc in each stitch to the first marker 1 HDC here then SKIP all stitches to the 2nd
Marker Place 1 HDC here, Hdc to the next marker place 1 HDC in the marked stitch then SKIP all
stitches to the next marker 1 HDC here and in each stitch to the end. Armholes made. (74)
Rows 12- 27 Ch1 turn Hdc in first stitch and each stitch to the end (74)
Rib rows:
Row 28 Ch2 FPDC around next stitch, BPDC around next stitch, repeat to last stitch HDC in the last
stitch
Row 29 Ch2 BPDC around next stitch, FPDC around next stitch repeat to last stitch Hdc in the last
stitch
Row 30 repeat Row 28
DO NOT FASTEN OFF continue to button and neck band unless using a different colour for the
band in which case join yarn in last st and ch1
Button and neck band
Row 1 CH1 working up the front edge fit 6 HDC into the ends of the rib rows then Hdc in the end
of each row up the front (32 HDCs)
Count your stitches it’s very important you have the same amount of stitches each side
Inc3 in the top corner stitch, Hdc in each stitch around the neck but SKIP the 4 large holes that
were the increase stitches on Row1, this helps to round the neck.
Inc3 in the corner stitch and continue placing 1 Hdc in the end of each row down the front
working 6 Hdc into the 3 Rib rows, ensure the last Hdc goes in the bottom corner of the front.
Count your stitches making sure you have 32 Hdcs down this front too.
Row 2 CH1 and Turn, Hdc in the same stitch, Hdc in the next 2, [ch1, skip 1 stitch, Hdc in the next
6 stitches] repeat 4 times, ( 5 button holes made) Hdc in next stitch (this should bring you to the
corner stitch) Inc3 in the corner stitch Hdc around the neck, Inc3 in the corner and Hdc down the
front to bottom stitch.
Row 3 Ch1 Turn, Hdc in same stitch, Hdc all the way to bottom of the opposite corner but this
time only place 2 Hdc in the corner stitches, FO sew in ends.
I find it easier to add the buttons now as it makes working the sleeves easier. Pull into shape.
This can be left hear for a cute little vest if you choose.
Sleeves:
The sleeves are decreased by skipping the last stitch on most rows. Ch2 at the beginning of each
row counts as the first DC unless stated so do NOT Dc in the same stitch as the Ch2.
Attach yarn in the middle of the underarm area Ch2
Row 1 Dc in same place as your Ch2 DC around the arm hole fitting 31 DCs around (Ch2 does not
count as a stitch) Do not join, sleeves are worked in rows not rounds.
Row 2 Ch2 Turn DC in each stitch (31 DC)
Row 3 Ch2 Turn DC in each stitch, skip last DC in top of previous Ch2 (30 DC)
Row 4 Ch2 Turn DC in each stitch, skip last DC in top of previous Ch2 (29 DC)
Row 5 Ch2 Turn DC in each stitch, skip last DC in top of previous Ch2 (28 DC)
Row 6 Ch2 Turn DC in each stitch, skip last DC in top of previous Ch2 (27 DC)
Row 7 Ch2 Turn DC in each stitch, skip last DC in top of previous Ch2 (26 DC)
Row 8 Ch2 Turn DC in each stitch, skip last DC in top of previous Ch2 (25 DC)
Row 9 Ch2 Turn DC in each stitch, skip last DC in top of previous Ch2 (24 DC)
Row 10 Ch2 Turn DC in each stitch, skip last DC in top of previous Ch2 (23 DC)
Row 11 Ch2 Turn DC in each stitch, skip last DC in top of previous Ch2 (22 DC)
Row 12 Ch2 Turn DC in every stitch including in the top of the chain2 (22 DC) Join to first DC
Rib rows are now worked in the round
Row 13 Ch2 (counts as first stitch here and next row) FPDC around next stitch, BPDC around next
stitch, repeat to last stitch Slst to join
Row 14 Repeat row 13 slst to join and fasten off leaving long tail.
Turn inside out and use tail to whip stitch the sleeve closed.